Thursday 28 April 2011

My Hobby Room


A bit of something different for this blog post.

A common topic on many hobby forums and something I always find pretty interesting is that of hobby spaces and hobby rooms. The little (or sometimes large!) sanctuaries we all have where we work away at what we love.

When I lived with my parents and family I never had a permanent hobby space that I could set up and leave projects for "hobby fermentation" (the creative kind, not the smelly, foosty kind!). I always looked on at threads where forumers posted their glorious hobby spaces with envy, aspiring to one day have my own full time space for modelling and painting.

Now that I'm older and have my own place with my long-suffering girlfriend, for the last 2 years I finally have a hobby place to call my own and here's some pics to prove it! (and because I don't think I've shared "my setup" before here):


My desk, complete with paint ranks (could use a couple more to be fair!), hobby mat, spray booth, manequins, lamps (with day light bulbs), a pretty view along the river and plenty of drawers and storage for bits and pieces!


A rather empty miniatures cabinet - because everyone needs somewhere to keep their work and still be able to see it for inspiration and to measure progress agaisnt.


The drawers beneath my desk, full of all manner of hobby tools and materials, along with the numerous boxes of models and parts that have started to accumulate here.


Finally, the model cupboard (well, one side of!), each white drawer is full of boxes or sprues of miniatures (because you can never have too many...!).

Thanks to the Royal Wedding tomorrow, I'll have a rare opportunity to spend some extra time in here working on some of the recent projects I've shared so hopefully I'll have something to show from these over the weekend.

Sunday 24 April 2011

Why I Hate Metal Mini's + On The Workbench


I hate metal miniatures. There is nothing more frustratingly time consuming than preparing a metal miniature for painting.

With resin and plastic you can remove mould lines, flash and imperfections relatively quickly with a scalpel and files/sand paper. With metals though, it not only takes much longer to remove these, since the material is much stronger and more brittle, but you also have to put up with pitting on almost all surfaces.

Yes, sometimes resin miniatures get spots where the finish is a little rough and pitted, but with metals it tends to be all over the figure. Very annoying!

There is a couple of ways to deal with this:


Sanding

Sanding pitted and rough surfaces with fine grit wet/dry paper (starting with 800 and finishing with 1000+) is a good starting point for cleaning up the surfaces of a metal miniature. For tighter nooks and crannies, you can cut small strips and glue them to pieces of wire or cocktail sticks to get in at them.

However, sanding will only go so far to clean up a metal miniature. Often the pitting involves both raised bumps and recesses, so unless you want to spend forever sanding a couple of mm off the entire model, you are going to need to do some filling too...


Milliput


Milliput is a two part epoxy putty that is water soluble, meaning it can be diluted to create a milky solution that can be applied with a brush and used to fill small recesses. Larger mould shift line recesses can also be filled with it as, while still fresh, it can be worked into shape and smoothed flush with the mini. It can then be filed to a smooth finish once cured. The only downfall is that it takes a couple of hours to fully cure and can take a while to ensure all gaps have been filled flush.


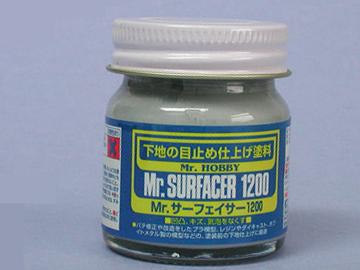
Mr Surfacer

Mr Surfacer comes as a grey liquid in a jar which cures in about 15 minutes to a plastic like finish. It can be applied neat from the jar to fill bigger gaps, or thinned (using Mr Colour Thinner) to create a more fluid mixture which can be painted on to fill smaller, shallower recesses. Mr Surfacer (1000 or 1200) can also be thinned and used as a primer through an airbrush, leaving a smooth finish.


One of the main benefits of this product is that no sanding is necessary on the finish as it is self levelling. Of course, if you aren't covering the entire surface, you will likely still have a small seam where the edge of the dried Mr Surfacer meets the metal surface of the model. In these instances, some light sanding with wet dry will be all that's needed.


On the Workbench

Why this outburst of hatred towards metal miniatures? Well, recently I decided to start working on an Inquisitor scale Eversor Assassin miniature from Games Workshop which I've had lying around since last year.


A nice sculpt, though with a horrendous amount of mould lines, mould shift, flash and pitting. The armour plating in particular required a lot of work to get it back to it's smooth shapes and hard edges. I also chose to remove all of the protruding injector type things from the armour plates. Partly to allow me to get them smooth and in shape again, partly because they were badly cast and would have required a lot of work to get back to their intended state and partly because I just think it looks cooler and more fitting of a sleek, deadly assassin.

All in all, I've spent about 3 days on and off just cleaning this miniature up and re-sculpting, detailing and filling areas to get it ready for paint.

Urgh!